Migrating to Framer page by page
Learn how to move your site from an external platform to Framer gradually without downtime
Move your site to Framer one page at a time with Advanced Hosting. This setup lets Framer serve completed pages while any remaining pages continue loading from your existing site.
Before you start, make sure you have these domains ready:
example.com, your custom domainexample.webflow.io, your external hosted siteexample.framer.app, your Framer staging domain
Set up your Framer project
In the Framer dashboard, create a new project and publish it. This gives you a live Framer project to connect to your domain and configure for migration.
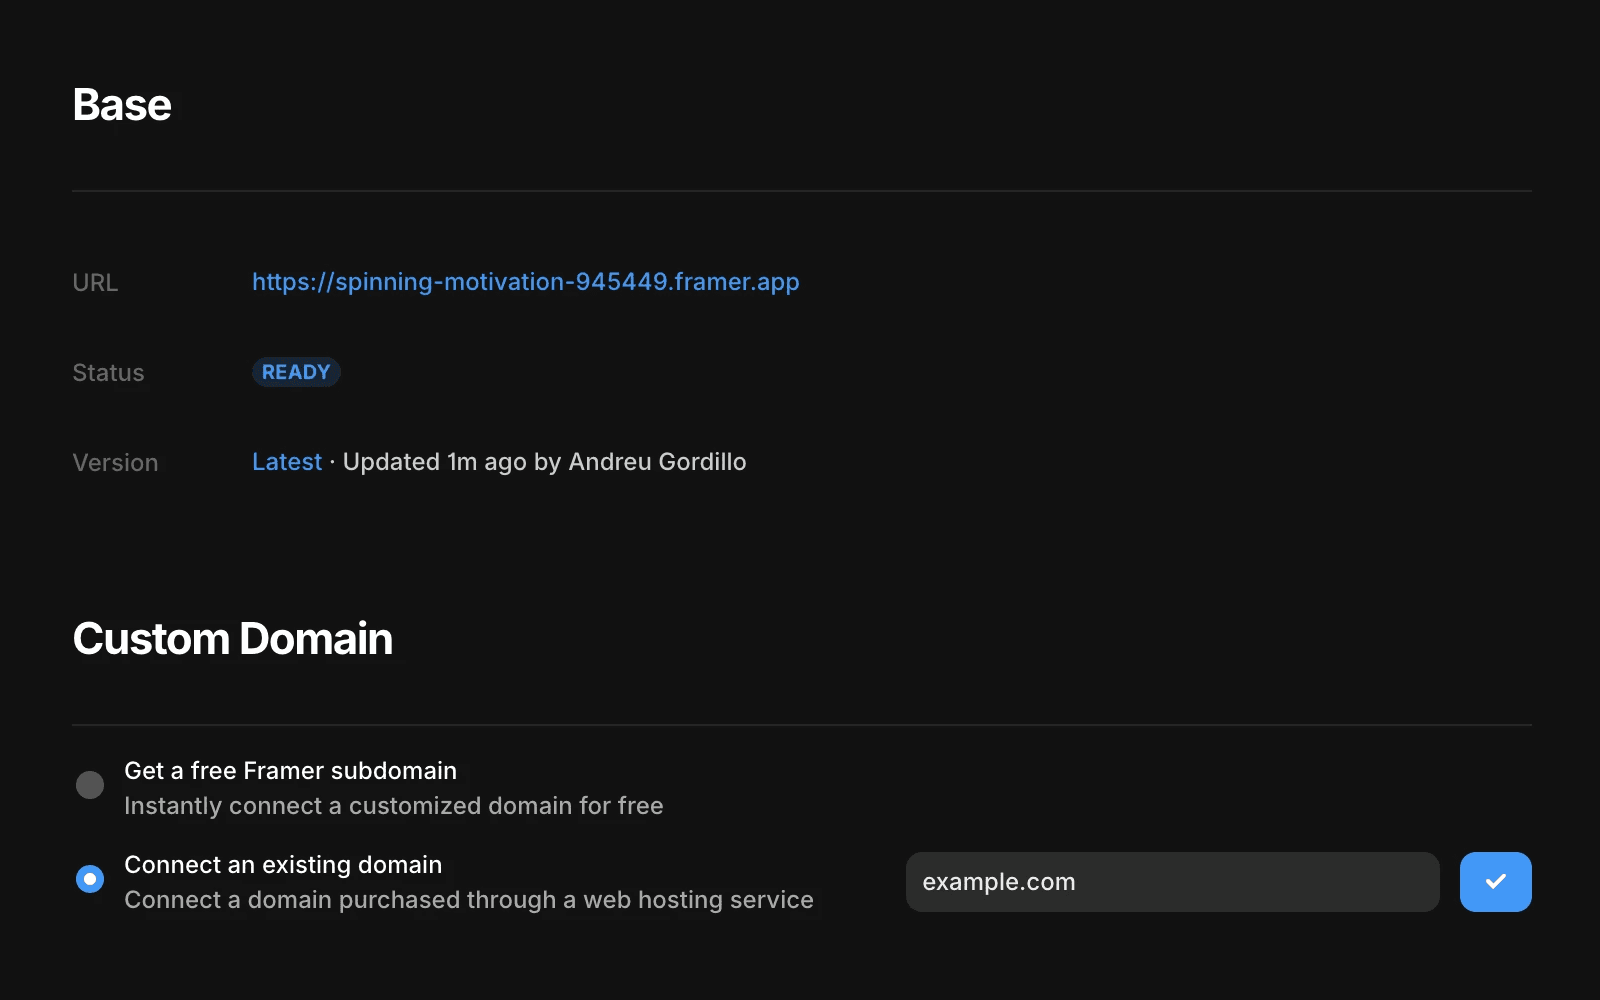
Add your custom domain
Go to Settings > Domains and connect your domain to the project.
Do not update your DNS records yet. You need to connect the custom domain first so you can access the Advanced Hosting settings in Framer.
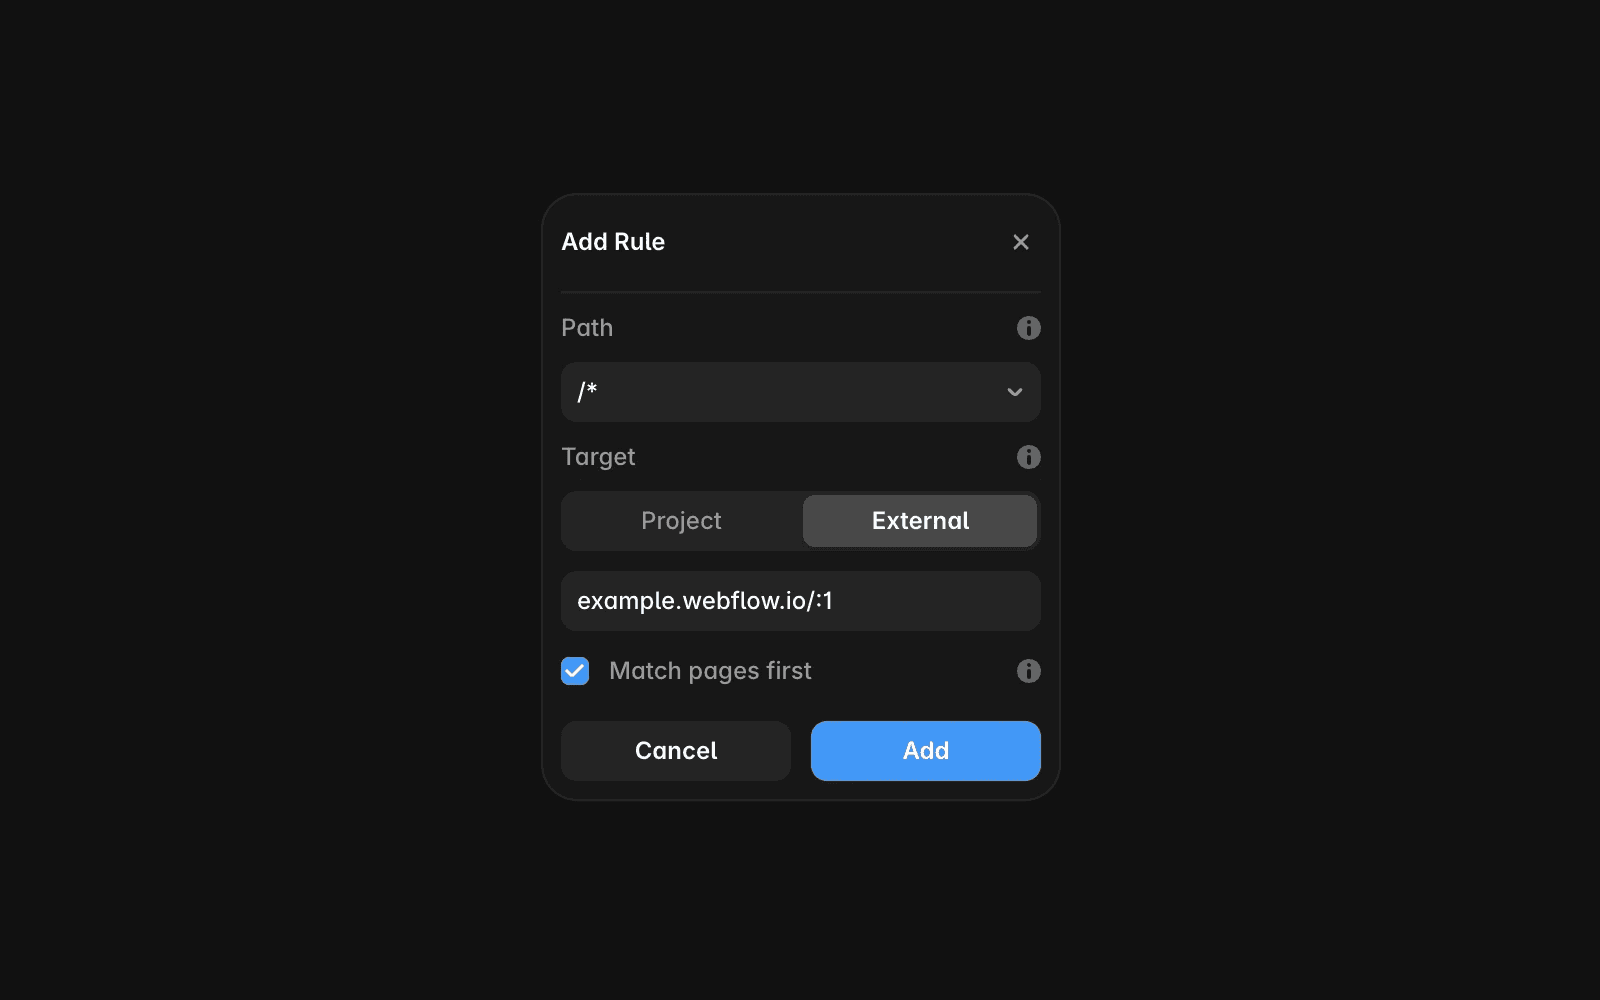
Create a wildcard Multi Site rule
In the Framer dashboard, open the domain from the left sidebar and go to the Multi Site tab.
Create a rule that sends all traffic to your existing external site:
Path:
/*Target: External
URL:
example.webflow.io/:1Match pages first: enabled
When “Match pages first” is enabled, Framer serves any page that exists in your Framer project first. If a page does not exist yet, the request falls back to your old site. This makes it possible to migrate page by page without adding extra rules.
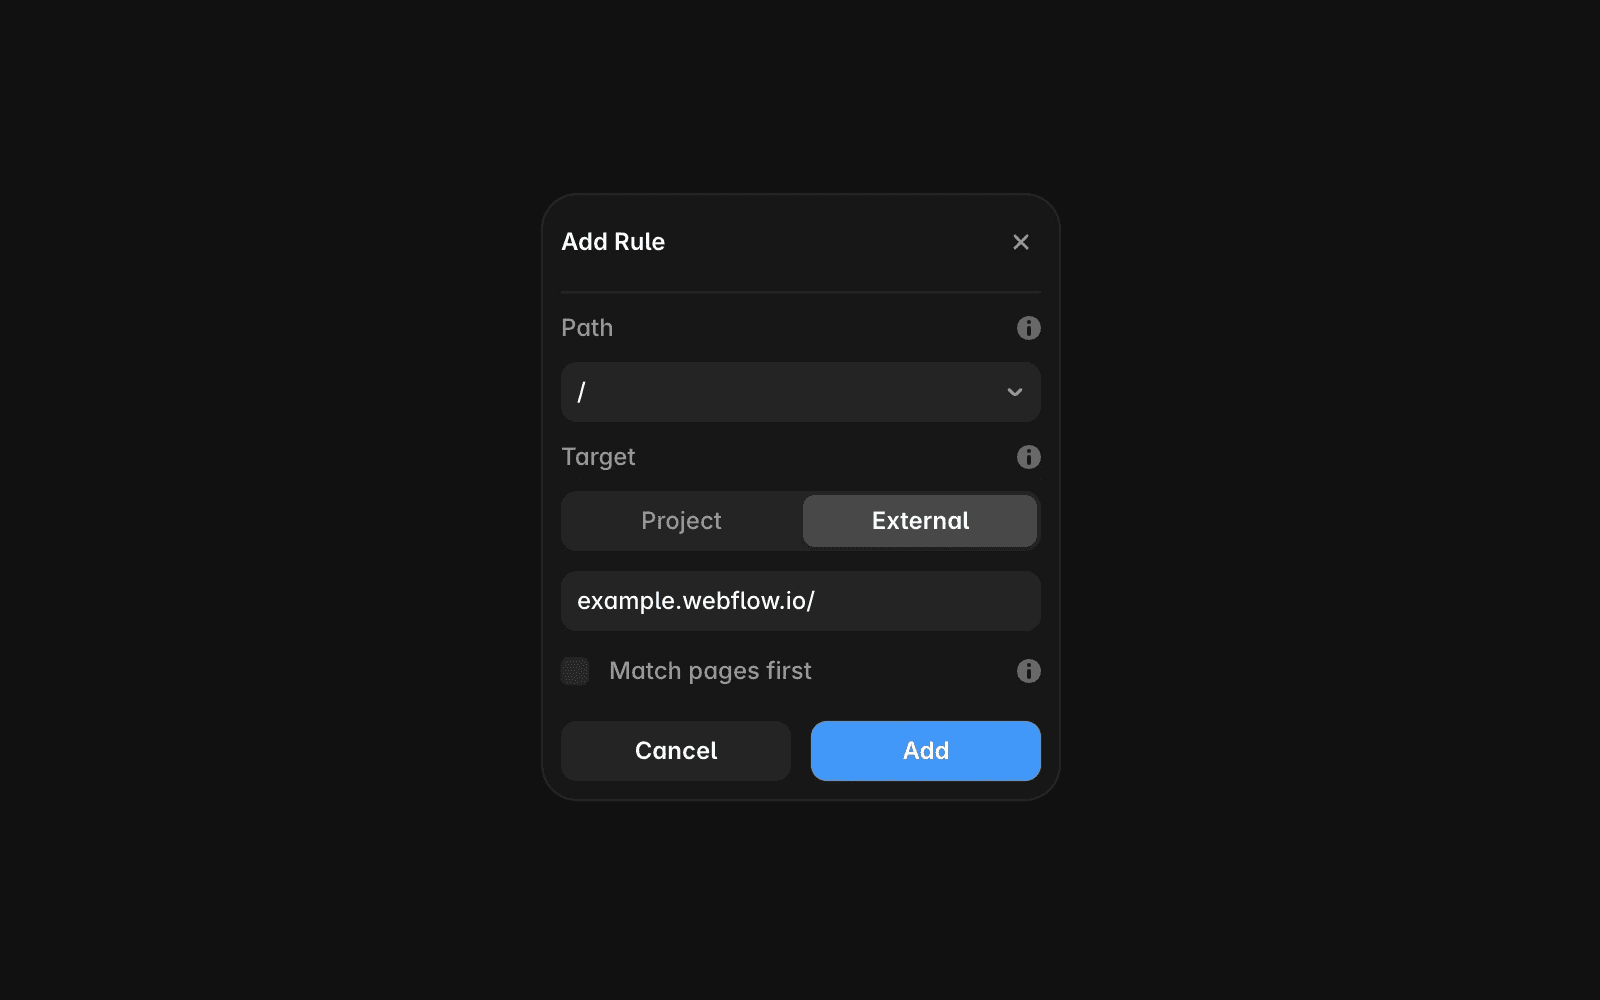
Add a rule for the home page
Next, create a separate rule for your home page so it continues loading from your old site until the Framer version is ready.
Use these settings:
Path:
/Target: External
URL:
example.webflow.io/Match pages first: disabled
Once your new home page is designed and published in Framer, you can remove this rule.
Publish the project again
Publish your project again after adding the rules. Then open your staging domain, such as example.framer.app, and confirm that your pages are loading correctly.
This is the safest way to verify the migration setup before updating your live domain.
Update your DNS records
After everything works correctly on the staging domain, update your DNS records at your domain provider so the domain points to Framer.
DNS changes can take a few minutes to propagate. You can verify the update with a DNS lookup tool, then visit example.com to confirm the site is working as expected.
Start migrating pages
Create and publish your Framer pages as they become ready. Because “Match pages first” is enabled on the wildcard rule, newly published Framer pages automatically replace the matching pages from your old site.
To make this work correctly, keep the page paths in Framer the same as the paths on your previous site.
Remove the wildcard rule when migration is complete
After all pages have been moved to Framer, remove the wildcard Multi Site rule with the /* path.
At that point, Framer will serve the full site directly, and the external fallback is no longer needed.
FAQ
Why do I need both a wildcard rule and a home page rule?
The wildcard rule handles all site paths and lets Framer replace pages as you publish them. The separate home page rule keeps
/on your old site until your new Framer home page is ready.What does “Match pages first” do?
It tells Framer to serve a matching page from your Framer project before falling back to the external site. This is what makes a gradual, page-by-page migration possible.
Can I update DNS before testing on the staging domain?
It is better to test everything on the staging domain first. That helps you confirm your rules are working correctly before directing live traffic to Framer.
Once your setup is in place, you can move pages over at your own pace without interrupting your live site.
Updated